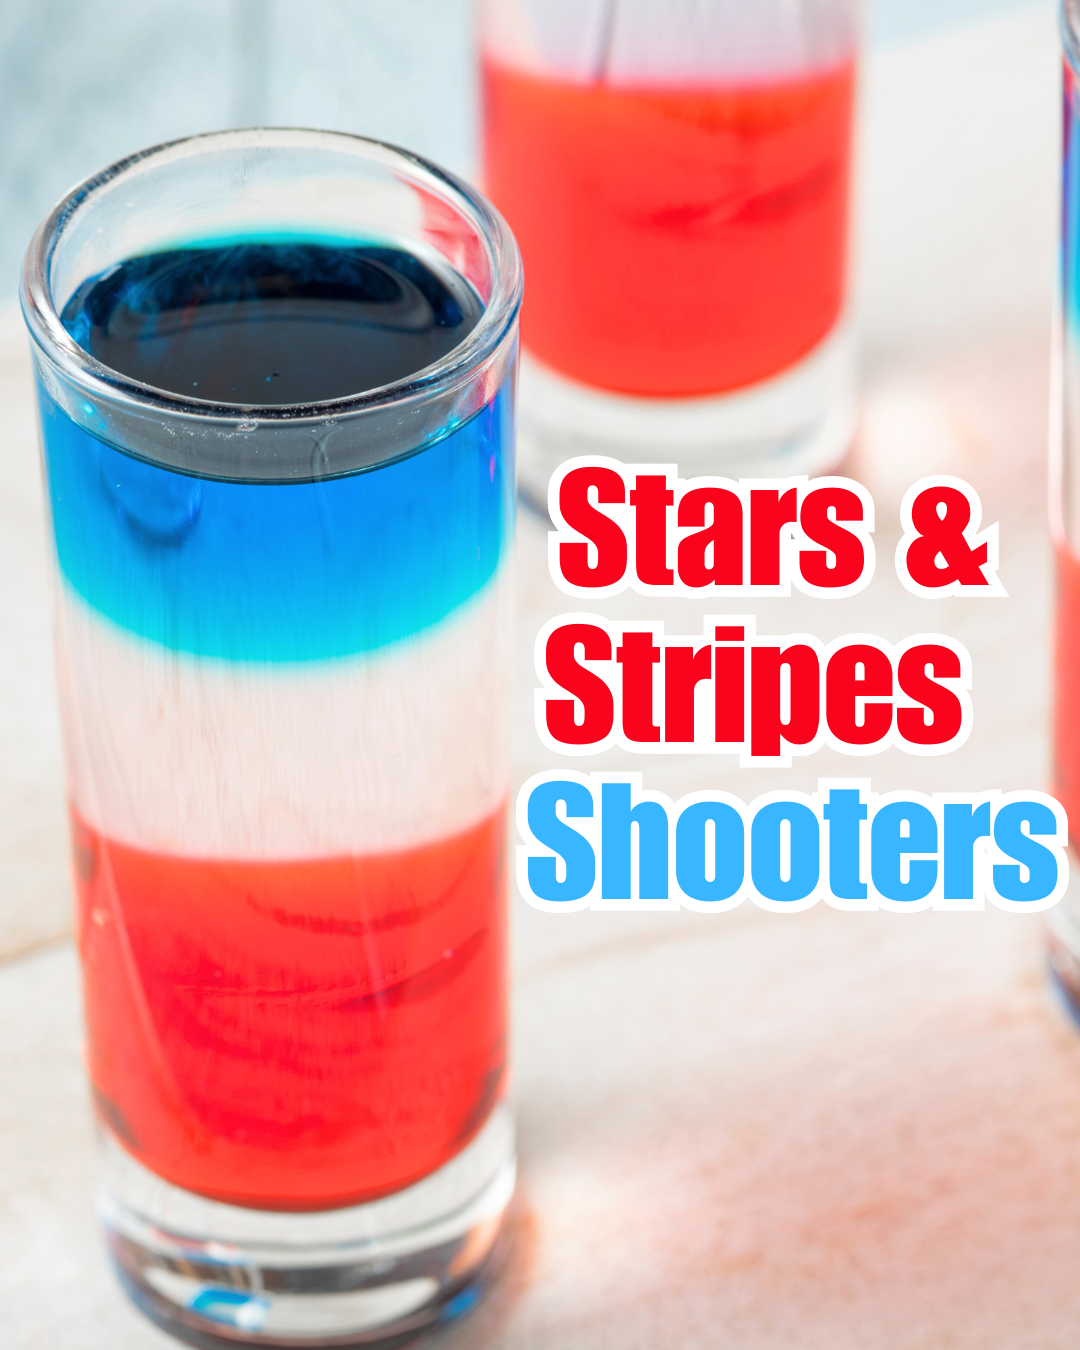
Stars and Stripes Shots
If you’re planning a 4th of July party and want to impress your guests with something a bit different, you can’t go wrong with Stars and Stripes Shooters. These patriotic shots not only look great with their red, white, and blue layers, but they also taste fantastic. You’ll need a steady hand to get the layers just right, but with a bit of practice, you’ll be serving these up like a pro.

To make these shooters, you’ll need a few key ingredients: grenadine, blue curaçao, and vodka – each in specific amounts. Start with 1 ounce of grenadine for the red layer. The white layer is achieved using 1 ounce of vodka, and the blue layer requires 1 ounce of blue curaçao. When I first attempted this at a summer barbecue, I realized the importance of pouring each layer slowly over the back of a spoon to prevent them from mixing. Feel free to experiment beforehand to perfect your technique.
There was one instance where I hurried and ended up with a tie-dye mess instead of crisp layers. If you face the same issue, remember to use a chilled glass and pour each layer even more slowly. Consider practicing the pour in the weeks leading up to your event to get a feel for it. Your guests will appreciate the attention to detail, and you’ll be the star bartender of Independence Day!
Preparing Your Workspace and Ingredients
Efficiency in making Stars and Stripes shooters starts with having everything ready. Ensuring your workspace is clean and ingredients are top-quality makes the process smoother and sets you up for success.
Choosing Quality Ingredients
Selecting the best ingredients is essential. Focus on getting vodka, blue curacao, and grenadine from a reputable store. Opt for high-quality brands to ensure the best taste. For the dairy component, use fresh milk or whipped cream. If you want to add a unique twist, consider garnishing with blueberries, raspberries, or strawberries.
Buy a good shot glass to measure your ingredients accurately. You’ll need:
- Grenadine: 1/2 ounce
- Blue curacao: 1/2 ounce
- Vodka: 1/2 ounce
- Milk/whipped cream: as per preference
I once used cheap grenadine, and the flavor was too sugary and off. Opting for a premium product made all the difference. Trust me, quality matters.
Setting Up Your Workspace
A well-organized workspace eliminates chaos. Begin by clearing your counter space and gathering your shot glass and ingredients. Make sure your tools are clean and ready for use. Arrange your bottles logically, with the grenadine, vodka, and blue curacao within easy reach.
Line up clean shot glasses for faster preparation. Lay out a tray with your garnishes, such as berries. Keep a towel handy for any spills. I always keep a small waste bin nearby for easy disposal of any waste.
A memorable mishap from my home bar days involved not having enough shot glasses. Now, I always count them out beforehand. Being prepared allows you to focus on creating the perfect shooter without distractions.
Layering the Shots
Creating stars and stripes shooters relies on careful layering of colorful ingredients to achieve the iconic look. This guide covers the crucial steps needed to ensure each layer is distinct and doesn’t blend with others.
Creating the Base Layer
Start by pouring 1 ounce of grenadine into the shot glass. The dense, red syrup will naturally settle at the bottom.
To avoid disturbing the base layer, tilt the glass slightly when pouring. I once hurried this step and ended up with a pink mess, so take it slow!
A little trick I picked up—let the grenadine sit for a moment. This ensures it settles completely before you add the next layer.
Adding the White Layer
Next, create the white layer using 1 ounce of chilled milk or half-and-half. Use the back of a spoon to slowly pour the milk over the grenadine. This method reduces the impact and prevents mixing.
Once, I used room temperature milk, and it ruined the layers. Always chill your ingredients!
Watch carefully as the white layer forms a clean line above the red, signifying a perfect pour. If the layers mix, let it settle and try again with a slower pour.